怎么在 GitHub 上用 jekyll 搭建自己的博客
从 jekyll 和 jekyll-now 开始
jekyll 是一个基于 Ruby 开发的开源静态网站生成器,支持 Markdown 和 HTML 两种文件类型,其中 HTML 使用了 Liquid 模板语言。它使用 Ruby 引擎将用 Markdown 编写的文章转换成静态的 HTML 文件,生成的网站可以方便地部署到各种网络服务器上。
jekyll-now是一个 jekyll 脚手架,可以基于它轻松地使用 GitHub Pages 服务创建 jekyll 博客,使用方式可以参考仓库ReadMe。
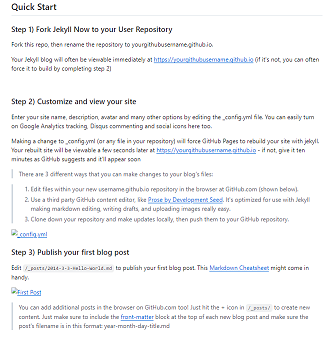 jekyll readme
GitHub Pages
使用GitHub Pages这个免费的静态网站托管服务,可以直接从GitHub仓库托管网站。
1
2
3
4
5
6
GitHub Pages 服务有如下特点,
- 支持 HTML、CSS 和 JavaScript 文件,并通过可选的构建过程运行文件,然后发布网站;
- GitHub Pages 适用于个人、组织和项目的网站托管,支持公开和私有仓库,但公开仓库才能访问;
- 提供 username.github.io 格式的免费域名,也支持自定义域名;
- 与 jekyll 集成,允许用户轻松创建博客和网站,同时自动处理页面生成和部署;
- 自动为站点提供HTTPS加密。
具体可以参考关于 GitHub Pages帮助文档。
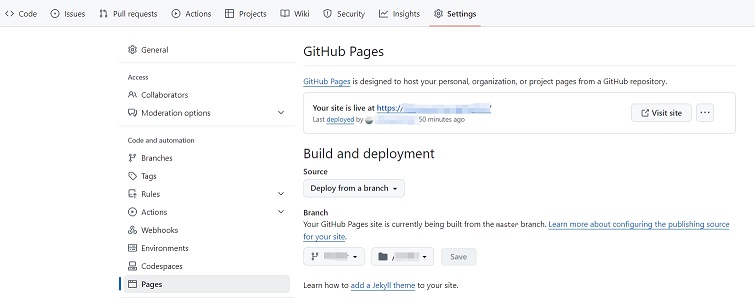 github pages setting
jekyll 主题
jekyll主题官网(http://jekyllthemes.org/)上提供很多特色主题,可以选择一套自己喜欢的主题来定制网站,本站使用的主题是jekyll-theme-chirpy(http://jekyllthemes.org/themes/jekyll-theme-chirpy/)。
建站步骤
- 选定
chirpy主题,在Github上fork主题仓库,仓库权限需要设置成public;
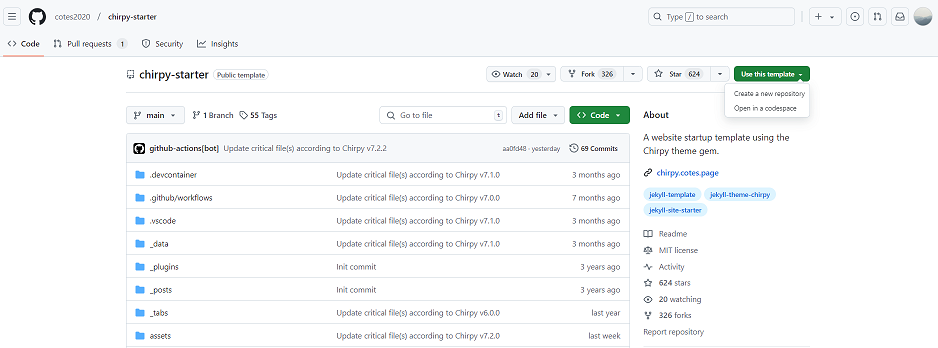 fork chirpy
- 这里使用
GitHub Pages服务提供的username.github.io免费域名,需要把fork的主题仓库名字改成username.github.io;
 user github io
- 浏览器输入域名简单看下效果,现在可以根据自己的需求定制样式了。
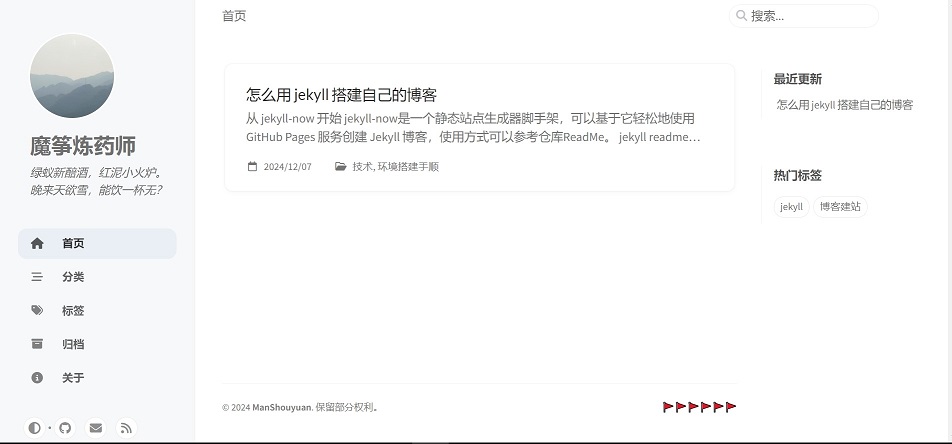 blog init home page
搭建本地环境
clone仓库到本地,在自己的主机上安装正确的运行环境,方便后期本地调整博客实时看效果安装
Ruby和jekyll运行环境(这里仅介绍 Windows 上的安装步骤,其他系统平台安装细节具体参见 jekyll官网文档);安装
jekyll、Bundler、github-pages;1 2 3 4
$ gem install jekyll $ gem install bundler $ gem install github-pages $ jekyll -v
Ruby 中,Gem(RubyGems) 和 Bundler(官网) 都是用于管理和处理项目依赖的工具。
1 2 3
Gem 和 Bundler 通常会结合使用; Gem 用于安装和管理单个 Gem 包(包管理器); Bundler 用于管理整个项目的依赖关系(依赖管理工具),确保项目中的 gem 版本一致,避免版本冲突和依赖不一致的问题。
- 到这里,运行环境配置好了,可以在本地运行了。
- 初始化博客配置
初始化博客配置
参考chirpy starter - getting-started - 博客内容编写好后,本机挂起博客网站随时查看调整内容
1
2
 $ bundle install
 $ bundle exec jekyll serve -P 5555 --watch
bundle install 命令的正确使用姿势
1 2
bundle install 命令在 Ruby on Rails 项目中用于安装和更新项目的依赖项,它会检查 Gemfile 文件中列出的所有依赖项,将它们安装到项目本地环境中。这个过程确保了项目中的所有依赖项都是最新的,并且可以避免因为依赖项版本不一致而导致的问题。 在使用 bundle install 命令之前,需要确保已经安装了 Ruby 和 RubyGems,另外需要在项目的根目录下创建一个名为 Gemfile 的文件,其中列出了项目所需的所有依赖项。最后要在包含 Gemfile 文件的项目根目录上运行。
jekyll gem 让 jekyll 可以通过命令行进行使用
1
2
3
4
5
6
7
8
9
10
11
12
13
14
15
16
17
18
jekyll new PATH
       - 使用基于 gem 的默认主题在指定目录中创建一个全新的 jekyll 站点,必要的目录也会被自动创建
jekyll new PATH --blank
       - 在指定的目录下创建一个全新的空的 jekyll 站点脚手架
jekyll build 或 jekyll b
       - 执行一次构建,并将生成的站点输出到 `./_site` (默认) 目录
jekyll doctor
       - 输出任何不推荐功能或配置方面的问题
jekyll help
       - 显示帮助信息,也可以针对特定子命令显示帮助信息,例如jekyll help build
jekyll new-theme
       - 创建一个新的 jekyll 主题脚手架
jekyll serve 或 jekyll
       - 本地开发,源文件更改时构建站点并提供本地访问服务,--watch 表示这个本地网页是实时刷新的,当更改网页的内容时它能实时变化,不用重启和加载网页
jekyll build
       - 为生产环境构建站点
jekyll clean
       - 删除所有生成的文件:输出目录、元数据文件、Sass 和 jekyll 缓存
- 确认博客内容符合预期后,把内容推到
Github仓库,自动构建部署成功后,在站点查看即可
网站效果图
配置评论系统
本站的评论功能通过集成giscus评论系统来实现。
jekyll博客是静态的,并没有评论功能,一般能用disqus、utterances或giscus评论系统来实现。本站使用的giscus开源免费,它是基于GitHub Discussions实现的。
在 GitHub Marketplace中能搜索到giscus应用,将其安装配置到
GitHub,可以在GitHub applicationis里边查看;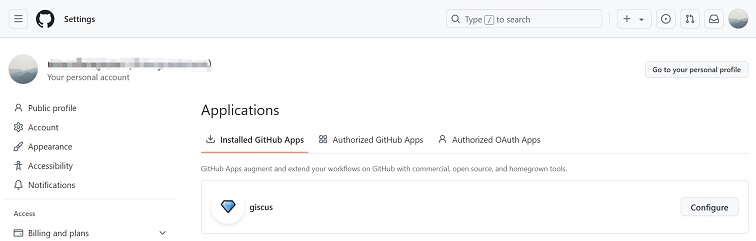 github applicationis page
在仓库
Setting-General-Features中选中Discussions,开启GitHub Discussions功能; github discussion checked
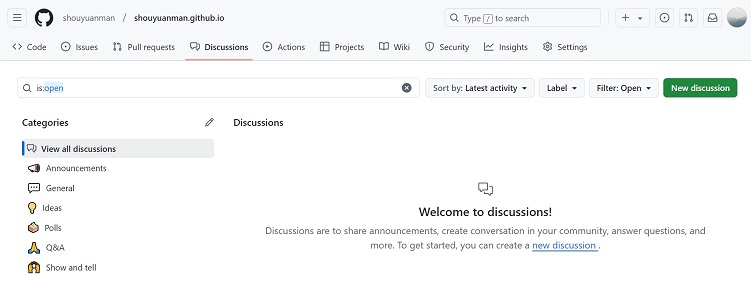 github discussion page
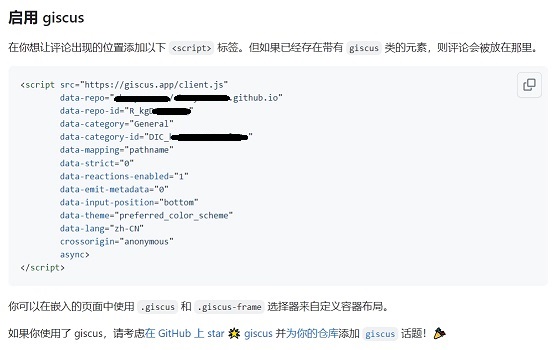
打开giscus配置页面,选择自定义配置,复制自动生成的
Enable giscus配置;giscus选项配置解析
1
2
3
4
5
Page-Discussions Mapping
       - 可以选择默认值 “Discussion title contains page pathname”;
       - 含义:URL 为 https://xxx.github.io/posts/title 的文章将映射到标题为 /posts/title 的  Discussion,用 URL 的 pathname 部分作为 Discussion 标题。
Discussion Category
       - 选择 Disussions 下边的类别名称,比如`General`,也可以自己定义。
 giscus enable content
把上面自动生成的配置放在
_config.yml中,重新构建发布后,就能看到评论系统了。
1
2
3
4
5
6
7
8
9
10
11
12
13
14
15
16
17
18
19
20
21
comments:
    # Global switch for the post-comment system. Keeping it empty means disabled.
    provider: giscus # [disqus | utterances | giscus]
    # The provider options are as follows:
    disqus:
        shortname: # fill with the Disqus shortname. › https://help.disqus.com/en/articles/1717111-what-s-a-shortname
    # utterances settings › https://utteranc.es/
    utterances:
        repo: # <gh-username>/<repo>
        issue_term: # < url | pathname | title | ...>
    # Giscus options › https://giscus.app
    giscus:
        repo: xxx/xxx.github.io # <gh-username>/<repo>
        repo_id: R_kgDxxx
        category: General
        category_id: DIC_kwDxxx
        mapping: pathname # optional, default to 'pathname'
        strict: # optional, default to '0'
        input_position: # optional, default to 'bottom'
        lang: # optional, default to the value of `site.lang`
        reactions_enabled: # optional, default to the value of `1`
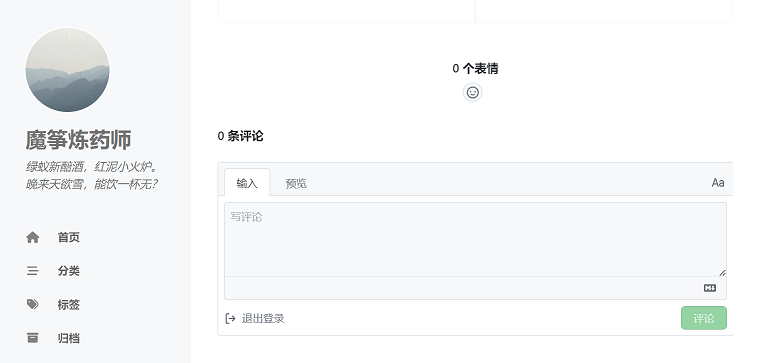 blog comment
写博客
参考Writing a New Post,写第一篇博客吧。
给网站添加一些小插件
先来看看功能效果图,
 效果图 1
效果图 1
 效果图 2
效果图 2
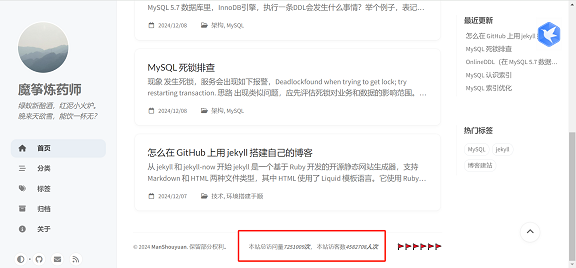
统计并显示网站访问量
jekyll chirpy主题中支持goatcounter计数器,貌似需要注册账号,本站没使用这种方式,而是选择了不蒜子计数,参考不蒜子使用手册。
分别创建统计网站pv/uv、网页pv计数器
1
2
3
4
5
 <script async src="https://busuanzi.ibruce.info/busuanzi/2.3/busuanzi.pure.mini.js">
 </script>

 <!-- pv的方式,单个用户点击1篇文章,本篇文章记录1次阅读量 -->
 本文总阅读量<em><span id="busuanzi_value_page_pv"></span>次</em>,
1
2
3
4
5
6
7
8
9
10
11
12
 <script async src="https://busuanzi.ibruce.info/busuanzi/2.3/busuanzi.pure.mini.js">
 </script>

 <!-- pv的方式,单个用户连续点击n篇文章,记录n次访问量 -->
 <span id="busuanzi_container_site_pv">
     本站总访问量<em><span id="busuanzi_value_site_pv"></span>次</em>,
 </span>

 <!-- uv的方式,单个用户连续点击n篇文章,只记录1次访客数 -->
 <span id="busuanzi_container_site_uv">
 本站访客数<em><span id="busuanzi_value_site_uv"></span>人次</em>
 </span>
分别把计数器添加到post、footer容器中
1
2
3
4
 <!-- ...... -->
 <!-- busuanzi counter -->
 {include page_pv.html content=content prompt=true lang=lang}
 <!-- ...... -->
1
2
3
4
5
6
 <!-- ...... -->
 <p>
 <!-- busuanzi counter -->
     {include site_pv_uv.html content=content prompt=true lang=lang}
 </p>
 <!-- ...... -->
使用网易云音乐插件播放音乐
在includes目录创建cloud-music.html
1
2
3
4
5
 <!-- cloud music -->
 <!-- auto=1 可以控制自动播放与否,当值为 1 即打开网页就自动播放,值为 0 时需要访客手动点击播放 -->
 <iframe frameborder="no" border="0" marginwidth="0" marginheight="0" width=330 height=86
         src="https://music.163.com/outchain/player?type=2&id=393685&auto=1&height=66">
 </iframe>
把cloud-music.html嵌入post容器
1
2
3
4
 <!-- 添加网易云音乐插件 -->
 {if page.music-id}
 {include cloud-music.html}
 {endif}
在md文件开头的配置项里添加 music-id: xxxxx
xxxxx为网易云外链播放器的曲目id。